Easy Cheesy Sausage Balls

Every time I bring these sausage balls to a party, they disappear before I even set down my bag.
That’s not an exaggeration. These Bisquick sausage balls are savory, cheesy, and a little bit addictive. The best part? You only need three ingredients to make them.
The outside gets golden and slightly crispy in the oven. The inside stays soft, meaty, and full of melted cheese.
I make these for holiday mornings, game day spreads, potlucks, and honestly just because it’s a Sunday and I feel like it. They work as a breakfast bite, a party appetizer, or a grab-and-go snack during the week. That kind of flexibility is rare in a recipe this simple.
The classic recipe uses just sausage, Bisquick, and sharp cheddar. But I’ll also show you a few easy tweaks, like adding cream cheese, that make these genuinely hard to stop eating. If you’ve ever ended up with dry, crumbly sausage balls, I’ve got you covered on that too.
This is the only sausage ball recipe you’ll need.
Can’t get enough of these sausage recipes? Check out these breakfast burrito recipe with sausages

Why You’ll Love This Recipe
- Only three ingredients: sausage, Bisquick, and cheddar cheese. That’s it.
- Ready in under 30 minutes. Mix, roll, and bake. No chilling, no resting, no waiting around.
- Practically impossible to mess up. This is a beginner-friendly recipe that consistently delivers great results.
- Make them ahead. Mix the dough the night before, or freeze a full batch, baked or unbaked, for later.
- Feeds a crowd without breaking the bank. Three affordable ingredients stretch surprisingly far. A single batch makes about 40 balls.
- Works for any occasion. Christmas morning, game day, potlucks, brunches, meal prep breakfast, or a quick weeknight snack. These fit everywhere.
- Kids and adults both love them. I’ve never met a person who turned one down.
- Customizable. Swap the cheese, change the sausage, or add a little heat. The base recipe is just the starting point.

Ingredient Notes
You only need three ingredients for this recipe. Here’s what to know about each one before you begin.
- Bisquick
Bisquick is the foundation of this recipe. It provides structure, fat, and leavening all at once, which is why sausage balls come together so quickly. Use the original Bisquick, not the reduced-fat version. The lower fat content changes the texture, resulting in drier, denser balls. If you don’t have Bisquick, you can create a quick substitute with flour, baking powder, salt, and butter. It works almost as well. - Pork Sausage
Use raw breakfast sausage, not pre-cooked. The fat in raw sausage melts into the dough while it bakes, keeping everything moist and flavorful. Jimmy Dean original is my favorite, but any bulk breakfast sausage works. If you want more heat, choose the hot variety. For a lighter option, turkey or chicken sausage also works, but the balls will be slightly leaner and less rich.
Tip: Take the sausage out of the fridge 15 minutes before mixing. Room temperature sausage blends much more easily. - Sharp Cheddar Cheese
Sharp cheddar provides the best flavor. Grate it yourself if possible. Pre-shredded cheese is coated with starch to prevent clumping in the bag, but that same coating can stop it from melting well into the dough. Freshly grated cheese binds better, melts properly, and keeps your sausage balls moist. You’ll notice a difference. - The Moisture Fix: Cream Cheese
This isn’t in the classic three-ingredient recipe, but I mention it here because it addresses the main issue with sausage balls – dryness. Add 4 ounces of softened cream cheese to your dough to make it richer, creamier, and easier to mix. If your sausage balls have turned out crumbly, this is the solution. Make sure to soften it fully before mixing to avoid lumps.

How to Make Bisquick Sausage Balls
This recipe takes about 30 minutes from start to finish. Here’s a quick overview before you start.

Step 1: Preheat Your Oven
Set your oven to 350°F. This temperature gives you a golden, slightly crispy outside without drying out the inside. If it’s too high, the outside browns before the sausage cooks through. If it’s too low, they come out pale and soft.
Line a baking sheet with parchment paper. It prevents sticking and makes cleanup easy.
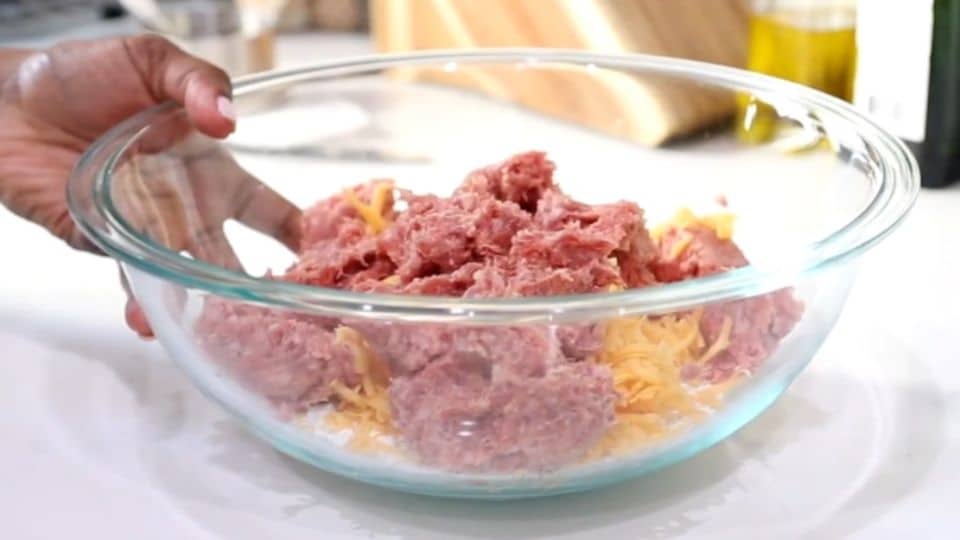
Step 2: Mix the Ingredients
Add your sausage, Bisquick, and cheddar to a large bowl. Then use your hands to mix.
I know it’s tempting to use a spoon or a stand mixer, but your hands are the best tool for this. They help you feel when everything is combined without overworking the dough. Mix until there are no dry spots of Bisquick and the cheese is evenly spread throughout.
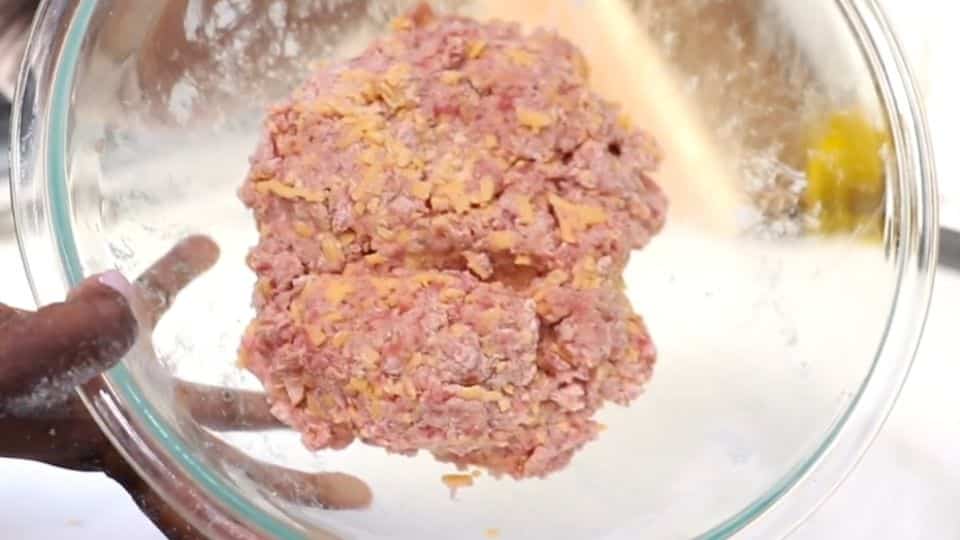
Don’t overmix. Once it comes together, stop. Overworking the dough makes the balls tough and dense.
Don’t undermix either. Dry Bisquick pockets lead to uneven texture and floury bites. Take an extra 30 seconds to make sure everything is mixed well.
If the mixture feels too dry or crumbly to roll, add your softened cream cheese now. Work it in until the dough holds together easily.

Step 3: Roll Into Balls
Scoop the dough and roll it into balls about the size of a golf ball. A cookie scoop is useful here. It portions the dough consistently, so every ball is the same size, which helps them finish baking at the same time.

Place the balls on your lined baking sheet about an inch apart. They don’t spread much, but they need some space.
Aim for consistency over perfection. Slightly uneven balls taste just as good. Just avoid mixing very small and very large ones on the same tray.

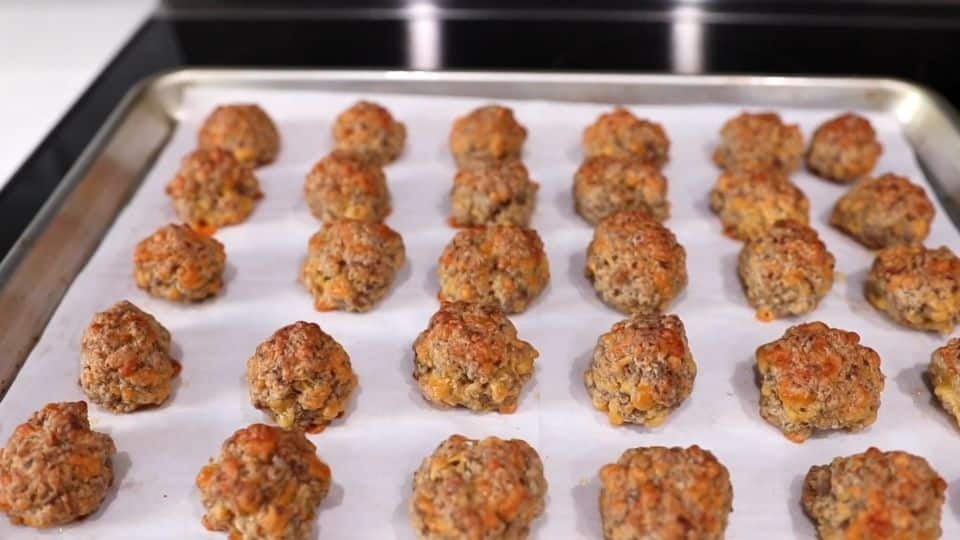
Step 4: Bake
Slide them into your preheated oven and bake for 20 to 25 minutes. Look for a deep golden brown color on the outside. The bottoms should be lightly browned too. If you want to make sure they’re done, use an instant-read thermometer. The center should read 160°F; that’s the safe internal temperature for pork.

Rotate the pan halfway through baking if your oven is hotter on one side.
Step 5: Rest and Serve
Take them out and let them sit for 5 minutes before serving. They firm up slightly as they cool and are easier to eat. Serve them warm for the best texture and flavor. Enjoy
Recipe Success Tips
These small things can make a big difference between good sausage balls and great ones.
- Use Room Temperature Ingredients
Take your sausage and cream cheese out of the fridge 15 minutes before you start. Cold sausage is stiff and hard to mix. Room temperature ingredients blend together faster and more evenly, requiring less effort. - Always Grate Your Own Cheese
I know the pre-shredded bag is convenient, but the starch coating on packaged cheese prevents it from melting and binding properly in the dough. Freshly grated cheese makes your sausage balls noticeably moister and more cohesive. It takes an extra two minutes and it is worth it every time. - Use a Cookie Scoop for Consistent Sizing
Uniform balls bake evenly. If some are small and some are large, the small ones dry out before the large ones cook through. A standard cookie scoop, about 1.5 tablespoons, gives you the perfect golf ball size with no guesswork. - Don’t Overmix the Dough
Mix until just combined, then stop. Overworking the dough develops too much structure, leaving you with tough, dense sausage balls. Think of it like biscuit dough gentle hands get you a better result. - Add Cream Cheese If the Dough Feels Dry
If your mixture is crumbling and won’t hold together when you roll it, add 4 ounces of softened cream cheese. Work it in gradually. This is the most reliable fix for dry sausage balls, and it makes them richer and more flavorful. - Line Your Pan With Parchment Paper
Foil works in a pinch, but parchment is better. It prevents sticking without drying out the bottoms, and cleanup takes about ten seconds. If you skip it, you risk leaving half your sausage ball stuck to the pan. - Let Them Rest Before Serving
Five minutes out of the oven makes a real difference. They firm up, the cheese settles, and they hold together much better when you pick them up. Serving them straight from the oven means they fall apart easily and can burn everyone’s mouths. Patience pays off here.

Variations and Ingredient Swaps
The classic three-ingredient recipe stands well on its own. However, it is also one of the easiest recipes to customize. Here are my favorite ways to change it up.
- Make Them Spicy
Replace mild sausage with hot breakfast sausage and swap cheddar for pepper jack cheese. If you want an extra kick, add a pinch of cayenne to the dough. The heat builds gradually as you eat them, making these dangerously easy to keep reaching for. They are always the first to disappear on a game day spread. - Add Cream Cheese for Extra Richness
Mix in 4 ounces of softened cream cheese with your other ingredients. The dough becomes noticeably creamier and easier to work with. The finished balls are richer, denser, and stay moist longer, making them ideal for make-ahead situations where they will sit out for a while. - Try a Ranch Seasoning Version
Add one packet of dry ranch seasoning to your dough. It completely changes the flavor profile. You get a tangy, herby, savory depth that goes especially well with a cold glass of sweet tea or a side of ranch dipping sauce. This is my most-requested variation. - Go Sweet and Savory
Serve your classic sausage balls with a side of maple syrup for dipping. You don’t need to change the recipe at all, just the accompaniment. The mix of salty, savory sausage and sweet maple is a breakfast table staple in the South and is genuinely one of the best flavor combinations in this recipe’s universe. - Use a Different Cheese
Sharp cheddar is the classic choice, but the recipe accepts substitutions well. Colby jack offers a milder, creamier result that kids tend to love. Smoked cheddar adds a subtle smokiness that pairs beautifully with pork sausage. Pepper jack brings the heat without changing the sausage. You can mix two cheeses together for something in between. - Make Them Gluten-Free
Use Bisquick’s gluten-free version in a straight 1:1 ratio instead of regular Bisquick. The texture is very close to the original. Nobody at your table will notice the difference, making these a great option when you’re cooking for a mixed crowd.

What to Serve With It
Sausage balls can fit in at almost any gathering. Here’s how I serve them based on the occasion.
-
Dipping Sauces
A good dipping sauce makes these snacks absolutely irresistible. Here are my favorites:
- Honey mustard, the tang pairs nicely with the richness of the sausage.
- Ranch dressing, a classic that works every time.
- Pepper jelly, a Southern favorite that adds a sweet and slightly spicy kick.
- Hot sauce, simple and effective; it’s great if you made the mild version and want more heat.
- Maple syrup, sounds unusual but tastes amazing, especially for breakfast.
Keep two or three options out when you’re serving a crowd. People enjoy having choices.
-
For a Christmas Morning Breakfast
This is when sausage balls really shine. Serve them with:
- Scrambled eggs or a simple egg casserole.
- Fresh fruit salad.
- Orange juice or coffee.
- Biscuits or cinnamon rolls on the side.
They last at room temperature for about two hours. This makes them perfect for a relaxed holiday morning where guests snack at different times.
-
For Game Day
Build a spread around them with:
- Buffalo wings or chicken strips.
- Chips, guacamole, and salsa.
- Sliders or mini sandwiches.
- A cold cooler of drinks nearby.
Sausage balls serve as hearty finger food that holds up well over a long afternoon of snacking. Make a double batch; you’ll need it.
-
For a Potluck or Party Appetizer Table
They fit naturally alongside:
- A cheese and charcuterie board.
- Pinwheel sandwiches.
- Pigs in blankets.
- Veggie tray with dip.
Bring them in a covered dish and reheat at 350°F for 8 to 10 minutes when you arrive. They taste just as good reheated as they do fresh out of the oven.
- For Brunch
Pair them with:
- A mimosa or sparkling water with citrus.
- A simple green salad with a light vinaigrette.
- Quiche or a frittata.
- Fresh pastries or muffins.
The richness of the sausage balls balances well with lighter, fresher brunch dishes. They anchor the table without overwhelming everything else.

Storage and Make-Ahead Instructions
One of the best things about this recipe is how well it can be prepared in advance. Whether you’re getting ready for a holiday morning or saving leftovers from last night, here’s what you need to know.
- At Room Temperature
Sausage balls can sit out safely for up to two hours. This makes them great for party tables and holiday spreads where people snack over time. After two hours, move them to the fridge. - In the Refrigerator
Store leftover sausage balls in an airtight container in the fridge for up to four days. They reheat well and taste almost as good as fresh. I think the flavor deepens slightly overnight as the sausage and cheese blend together.
To reheat from the fridge:- Oven: 350°F for 8 to 10 minutes. This method restores the slightly crispy exterior without drying them out.
- Microwave: 30 to 45 seconds on medium power. This is quick and convenient, but the outside softens. It’s fine for a weekday snack, but not ideal for serving guests.
- Air fryer: 350°F for 3 to 4 minutes. This gives you a result that’s almost fresh from the oven with minimal effort.
- In the Freezer
Sausage balls freeze well. This is genuinely one of the best make-ahead recipes for that reason. You have two options based on your situation.- Freezing unbaked sausage balls:
This is my preferred method. Roll the dough into balls and place them on a parchment-lined baking sheet in a single layer. Freeze for one to two hours until solid, then transfer to a zip-lock freezer bag. Label it with the date. They keep well for up to three months.
When you’re ready to bake, pull them straight from the freezer onto a lined baking sheet. Bake at 375°F for 25 to 30 minutes; no thawing is needed. Add five minutes to the standard baking time and check that the internal temperature reaches 160°F. - Freezing baked sausage balls:
If you already baked a batch and have leftovers, let them cool completely first. Never freeze them warm or you’ll get ice crystals and a soggy texture. Transfer them to a freezer bag in a single layer, if possible. They keep for up to three months.
To reheat from frozen: bake at 350°F for 12 to 15 minutes until heated through. The oven is the only method I recommend here. The microwave can make them rubbery, and the texture suffers noticeably.
- Freezing unbaked sausage balls:

Frequently Asked Questions
- Why are my sausage balls dry and crumbly?
This is the most common issue with sausage balls, and it usually comes down to three reasons. First, you might have too much Bisquick, which can dry everything out. Second, pre-shredded cheese doesn’t bind as well as freshly grated cheese, affecting moisture and cohesion. Third, the sausage might be too lean. The solution for all three problems is the same: add 4 ounces of softened cream cheese to your dough. Mix it in gradually until the mixture holds together when pressed. This fix works every time. - Can I make sausage balls ahead of time?
Yes, and I recommend it. You have two good options. Mix the dough the night before, tightly cover it, and refrigerate until morning. Then roll and bake fresh the next day. Alternatively, roll the unbaked balls, freeze them solid on a baking sheet, and transfer them to a freezer bag for up to three months. Bake them straight from frozen at 375°F for 25 to 30 minutes. Both methods yield results just as good as same-day preparation. - Can I freeze Bisquick sausage balls?
Absolutely. Freezing is one of the best features of this recipe. You can freeze them unbaked or fully baked. Either way, they last up to three months. Be sure the baked balls are completely cool before freezing; otherwise, you’ll get ice crystals that ruin the texture when reheated. - How do I know when sausage balls are done?
Look for a deep golden brown color on the outside and light browning on the bottom. The surface should be set and dry, not shiny or soft. If you want to be sure and with pork, it’s important use an instant-read thermometer. The center should reach 160°F. If the outside starts browning too quickly, loosely cover with foil and give them a few more minutes. Every oven is slightly different, so trust the thermometer more than the timer.

Easy Cheesy Sausage Balls
Ingredients
Method
- Set your oven to 350°F.
- Line your baking sheet with parchment paper.
- Add your sausage, Bisquick, and cheddar to a large bowl. Then use clean hands to mix.
- Mix until there are no dry spots of Bisquick and the cheese is evenly spread throughout.
- If the mixture feels too dry or crumbly to roll, add your softened cream cheese now. Work it in until the dough holds together easily.
- Scoop the dough and roll it into balls about the size of a golf ball.
- Place the balls on your lined baking sheet about an inch apart.
- Slide them into your preheated oven and bake for 20 to 25 minutes.
- Rotate the pan halfway through baking if your oven is hotter on one side.
- Bake until fully cooked and golden brown
- Once baked, and timer is up, take them out and let them sit for 5 minutes before serving.
- Serve them slightly warm for the best texture and flavor.
Check out this other party recipes
- Rotel Dip with Ground Beef. The flavor combination if this rotel dip is hard to beat. Seasoned ground beef, melty Velveeta, and a can of Rotel tomatoes with green chiles make it rich, slightly spicy, and completely irresistible with a pile of tortilla chips on the side.
- Classic deviled eggs. These deviled eggs disappear fast at a party. It’s every time. They look good, they travel easily, and they take less than 30 minutes to prepare.
- The Best Creamy Spinach Artichoke Dip. This spinach artichoke dip is one of those recipes I make all the time. It’s warm, cheesy, and wonderfully creamy. It comes together in under 30 minutes.
- How to Make Buffalo Chicken Dip. There’s always that one dish at every party that goes first. People gather around it. They come back for a second scoop before finishing the first. That dish is buffalo chicken dip, and this is the recipe that makes it work every time.
- The Best Sloppy Joe Recipe To Make Tonight. The texture is everything a sloppy joe should be: saucy and hearty, with just enough thickness to stay on a bun without sliding off the plate.