Easy to Peel Hard Boiled Eggs – Perfect Every Time
Hard boiled eggs seem like the simplest thing in the world. Boil water, add eggs, done, right? Not quite.
Have you ever pulled an egg out of the pot only to find a rubbery white , a chalky yolk, or that annoying grey-green ring that shows something went wrong? Then there’s the peeling. Chunks of white come off with the shell. A perfectly good egg wasted.
Here’s the good news: none of that has to happen.
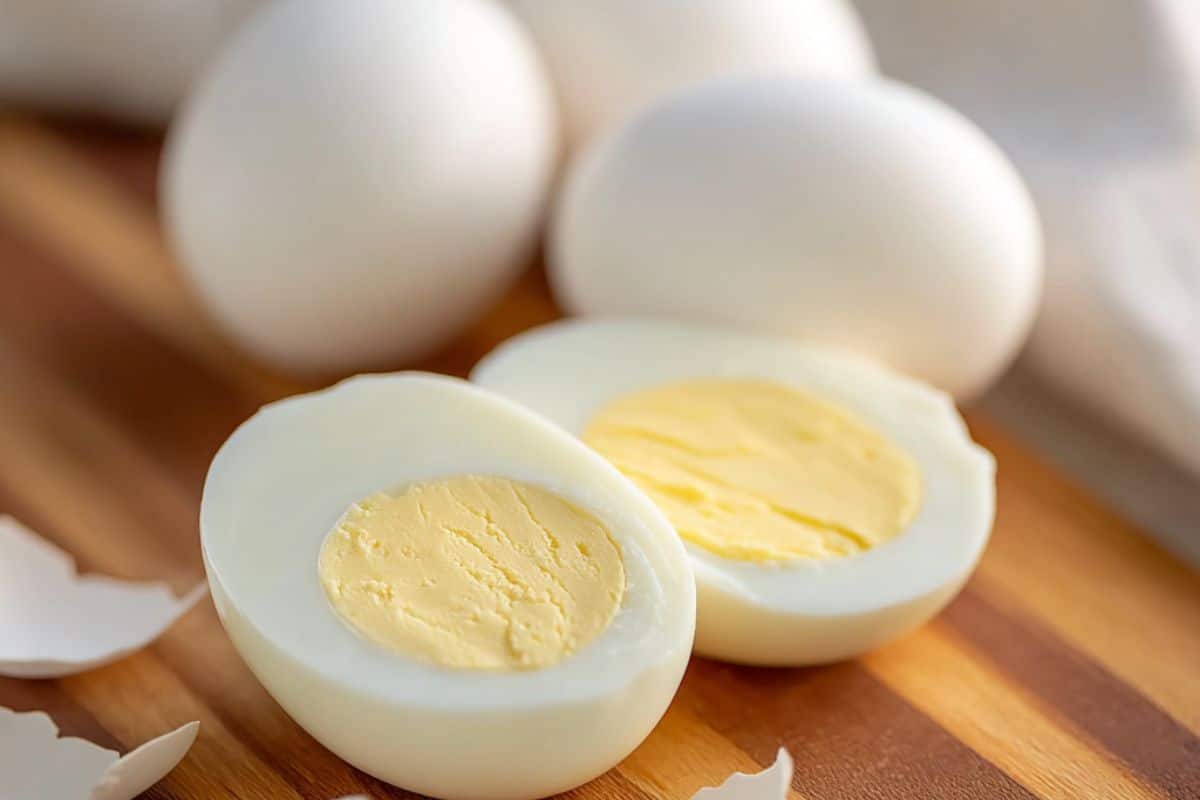
This recipe gives you perfect hard-boiled eggs every time. The yolk is fully set but still creamy and bright yellow. The white is firm but tender, never tough. The shell? It slides right off.
The secret comes down to two things: controlled cooking time and an ice bath. That’s it. No fancy equipment. No complicated technique. Just a pot, some water, your eggs, and a bowl of ice.
I make a batch of these eggs every Sunday. They sit in my fridge all week, and I reach for them constantly as a quick snack, sliced onto salads, mashed into egg salad, or packed into lunchboxes. They are one of the most affordable, high-protein, truly useful things you can keep on hand.
Whether you’re prepping meals for the week, making deviled eggs for a gathering, or just want a reliable snack ready to go, this recipe has you covered.
Can’t get enough egg recipes? Check out this Classic Deviled Eggs Recipe.
Why You’ll Love This Recipe
- It’s ready in under 15 minutes. From cold water to perfectly cooked eggs, the whole process is quick. No long cook times, no watching the stove.
- You only need one ingredient: eggs. That’s it. Water and ice don’t count. This is as affordable and easy as cooking gets.
- The results are the same every time. Once you follow this method once, you’ll get the same perfect result each time. No more guessing, no more gray yolks.
- It’s the best meal prep food. Make a batch of six or twelve on Sunday, and you’ll have grab-and-go protein ready all week. No reheating needed.
- They’re very versatile. Eat them plain with a pinch of salt, pickled onions, slice them into salads, mash them into egg salad, or make deviled eggs. Hard-boiled eggs fit into many different meals.
- Kids and adults both enjoy them. They’re mild, filling, and easy to eat. Perfect for lunchboxes, after-school snacks, or a quick breakfast on a busy morning.
- No special equipment is needed. You don’t need an Instant Pot, a steamer, or any gadget. Just a regular pot and a bowl of ice water.
- They stay fresh all week. Store them in the fridge, and you’ll have a ready-made snack or meal addition for up to five days. That’s real convenience.
Ingredient Notes
You only need a few things for this recipe. Here’s what to know before you start.
- Eggs
Any large eggs will work here, but older eggs peel much easier than fresh ones. As an egg ages, it loses a bit of moisture, and the membrane inside pulls away slightly from the shell. That tiny gap makes peeling clean and easy. Eggs that are 7 to 10 days old are ideal.
If you buy eggs from a grocery store, they are usually around a week or two old, which is perfect. If you get fresh eggs from a farmer’s market, save those for frying or scrambling and use your grocery store eggs for boiling. - Water
Use enough cold water to cover the eggs by at least one inch. Starting with cold water, rather than placing eggs in boiling water, helps prevent cracking from sudden heat. Some people prefer the boiling-start method. It works too, but it requires more caution and increases the chance of cracked shells. The cold start is easier, more forgiving, and just as effective. - Salt (Optional)
Some cooks add a teaspoon of salt to the water. It won’t add much flavor since the shell keeps most of it out, but it can help the egg white set faster if a shell cracks during cooking. I add it out of habit; it doesn’t hurt anything. - Ice
The ice bath is the most important part of the whole recipe. The moment the eggs come out of hot water, they continue cooking from residual heat. The ice bath stops that immediately. It prevents the green ring around the yolk, keeps the whites tender, and makes the shell easier to peel.
Fill a large bowl with cold water and a good amount of ice cubes before you put the eggs on the stove. Have it ready to go. No ice? Run the eggs under the coldest tap water for several minutes. It’s not quite as effective, but it works in a pinch. If you’re serious about meal prepping eggs regularly, keep ice on hand. It makes a real difference.
How to Make Hard Boiled Eggs
This whole process takes about 15 minutes. Let’s walk through it step by step.
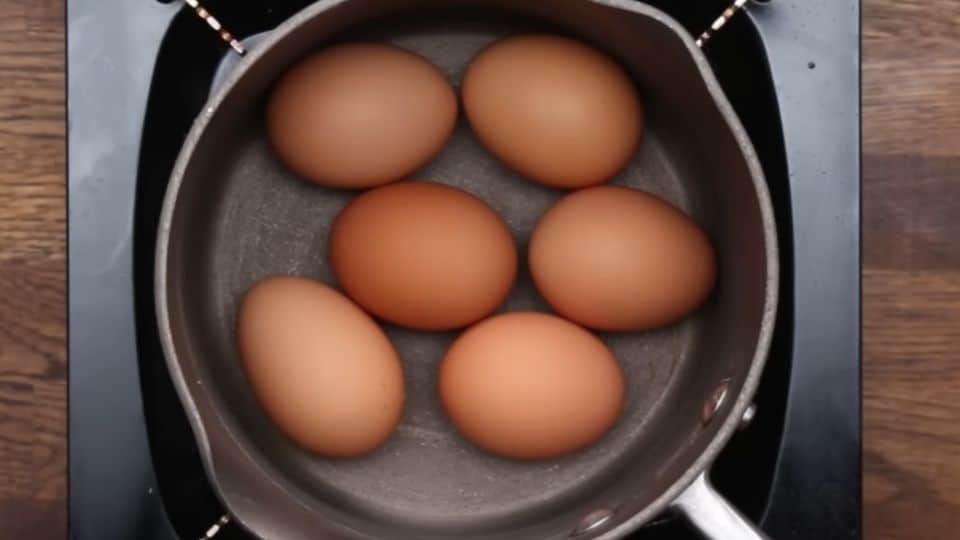
Step 1: Arrange the Eggs
Place your eggs in a single layer at the bottom of a pot. Don’t stack them. A single layer ensures every egg cooks evenly and at the same rate. Use a pot that gives the eggs some room. If it’s too tight, they will knock against each other and crack.
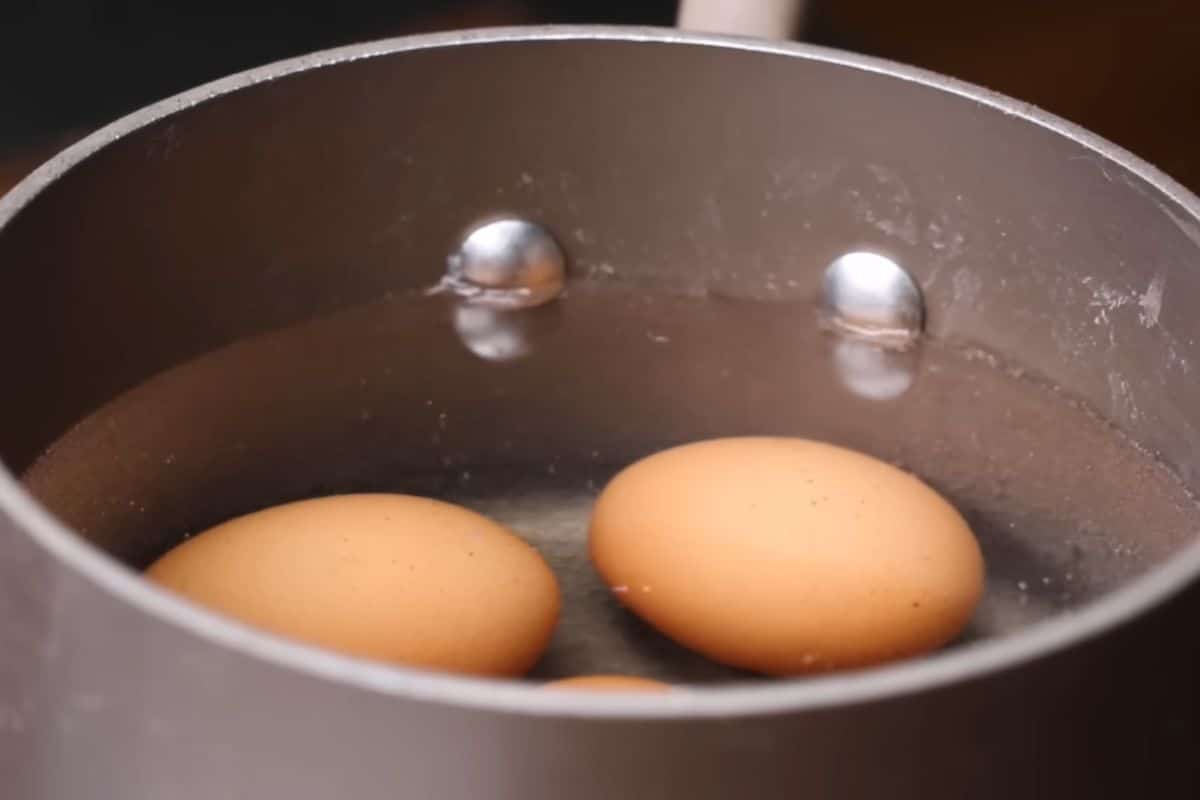
Step 2: Cover With Cold Water
Pour cold water over the eggs until they are covered by at least one inch. Starting with cold water helps the eggs heat gradually, which reduces cracking and gives you more control over the final texture. Add a pinch of salt here if you like.
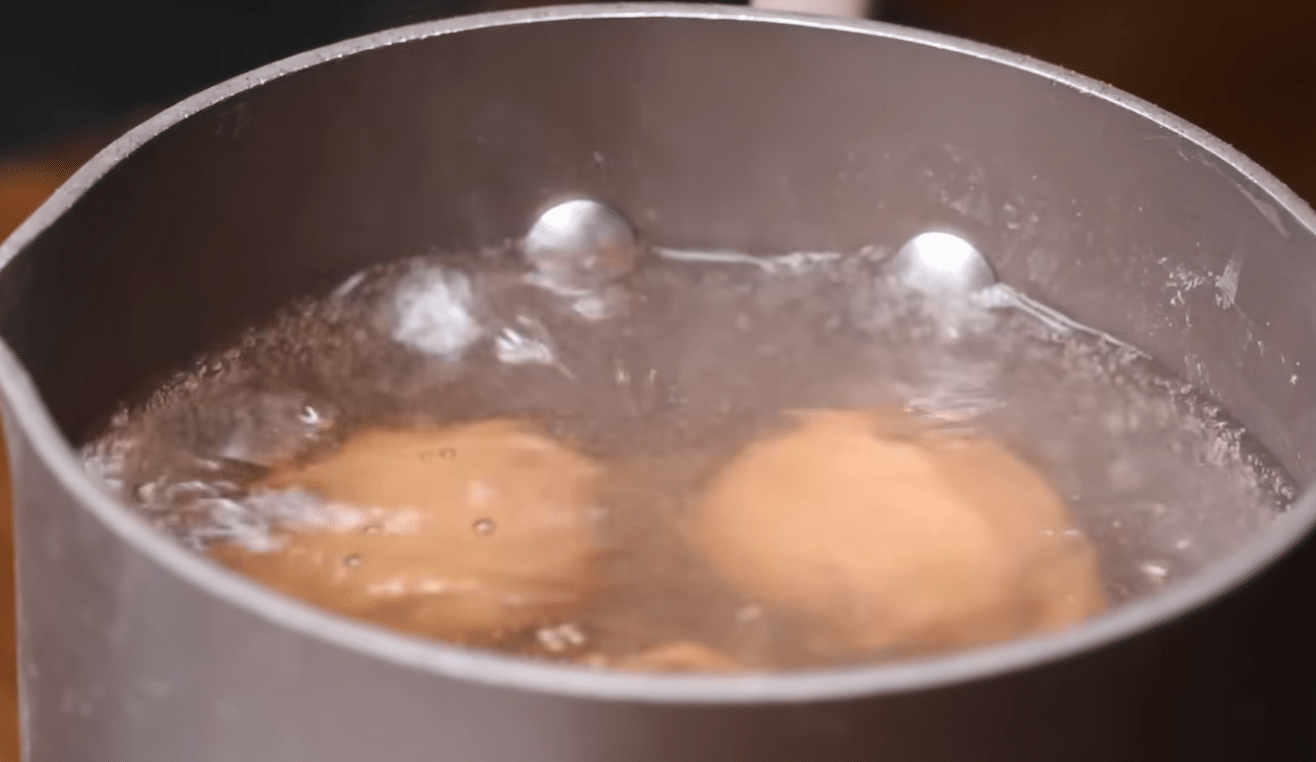
Step 3: Bring to a Full Boil
Place the pot on the stove over medium-high heat. Let it come to a full, rolling boil; you’ll see vigorous bubbles breaking the surface. Don’t walk away during this step. It goes faster than you expect.
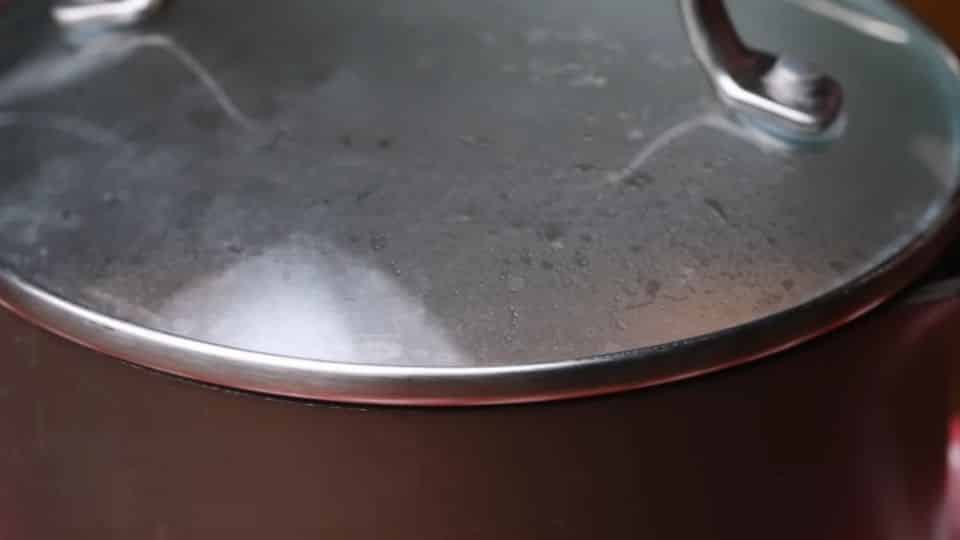
Step 4: Cover and Remove From Heat
The moment the water reaches a full boil, cover the pot with a lid and remove it from the heat completely. This is the key move. The leftover heat inside the covered pot finishes cooking the eggs gently. No aggressive boiling, no rubbery whites. Just calm, even heat doing its job. Now set your timer. This is where doneness is decided.
| Time in Covered Pot | Result |
|---|---|
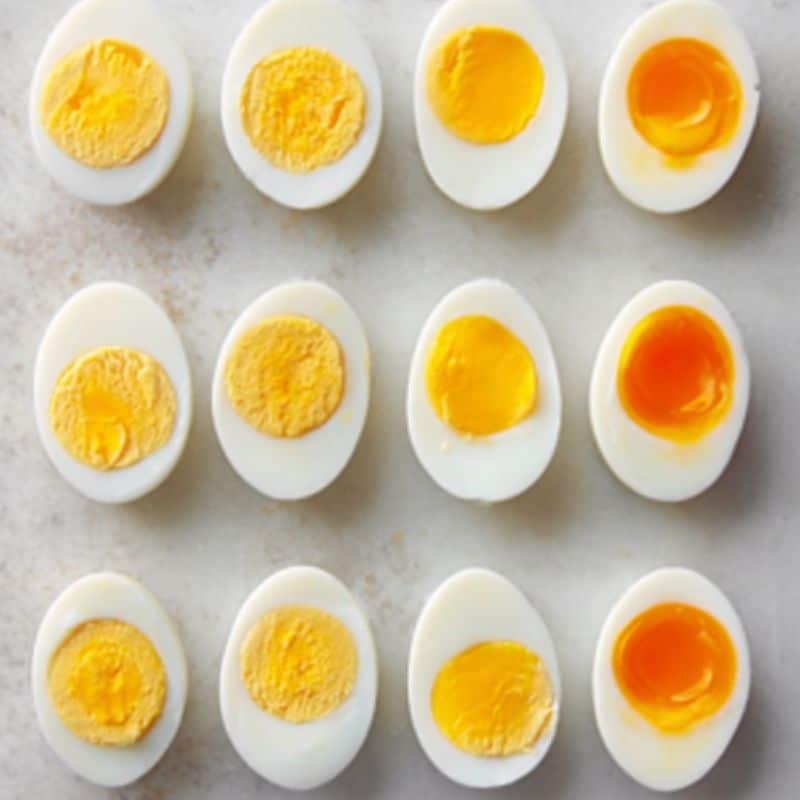
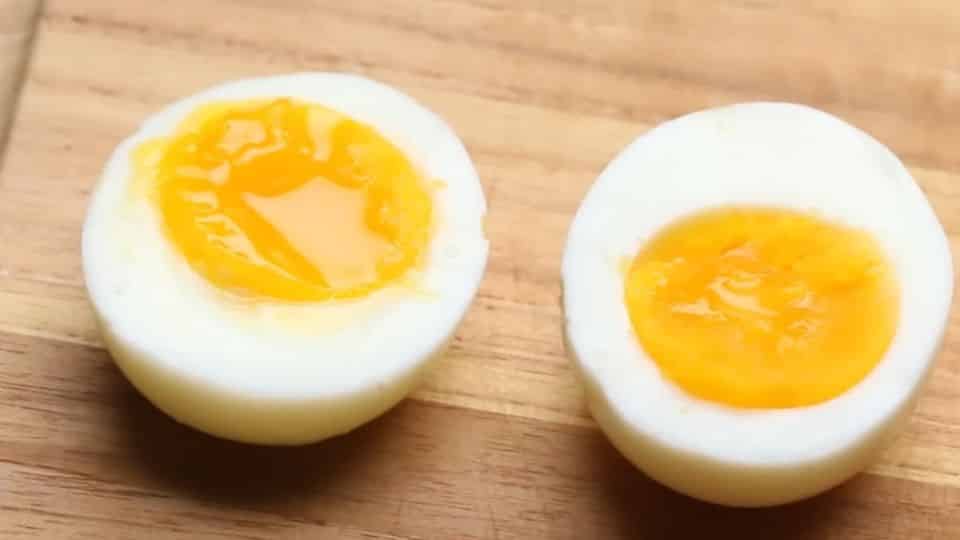
| 6 minutes | Soft boiled with jammy, runny center |
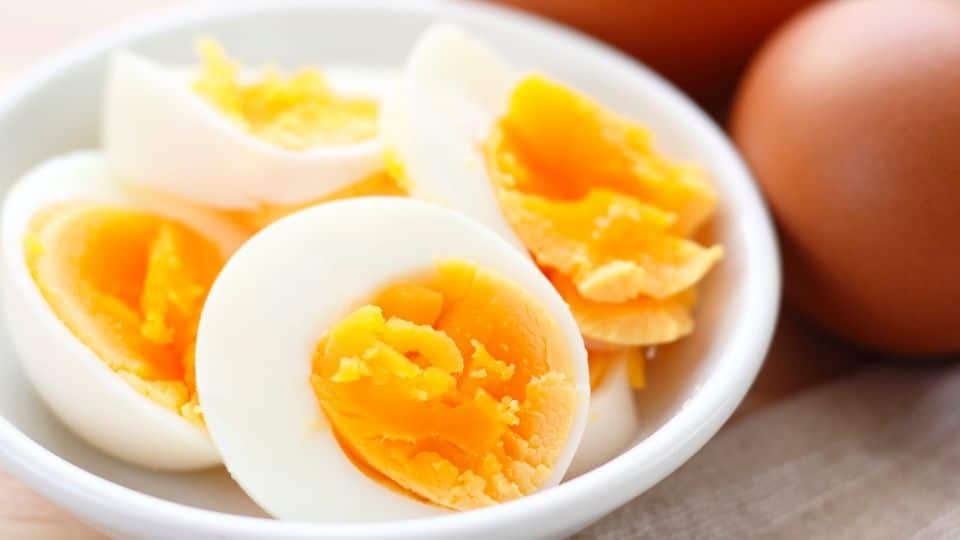
| 12 minutes | Classic hard boiled with firm, fully set yolk |
| 10 minutes | Hard boiled with fully set, creamy bright yolk |
| 8 minutes | Medium boiled with mostly set, slightly soft yolk |
| 14+ minutes | Overcooked with dry, crumbly york, risk of green ring |
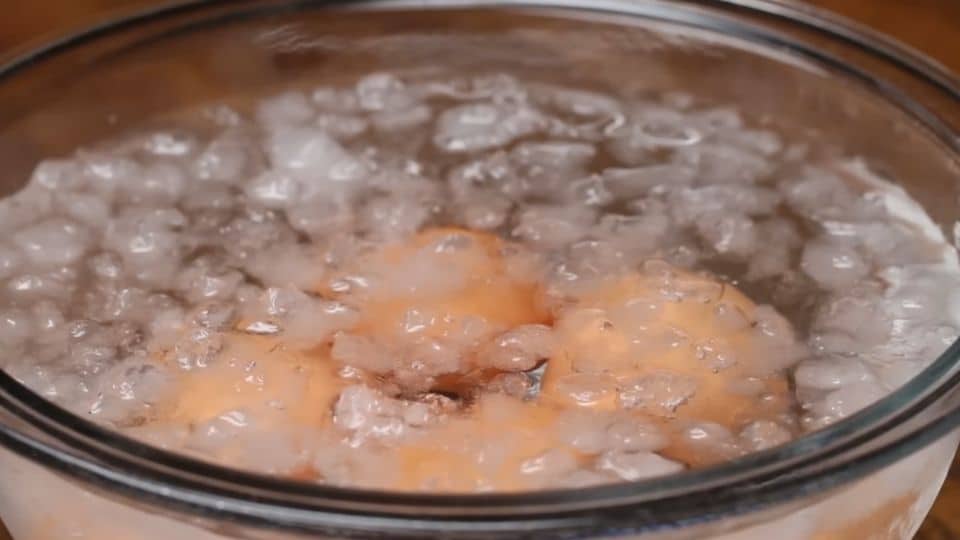
Step 5: Transfer to the Ice Bath
When the timer goes off, use a slotted spoon to transfer the eggs straight into your ice bath. Don’t wait. Every second counts here. Let the eggs sit in the ice water for at least 10 to 12 minutes. This stops the cooking completely and lets the eggs cool enough to handle and peel.
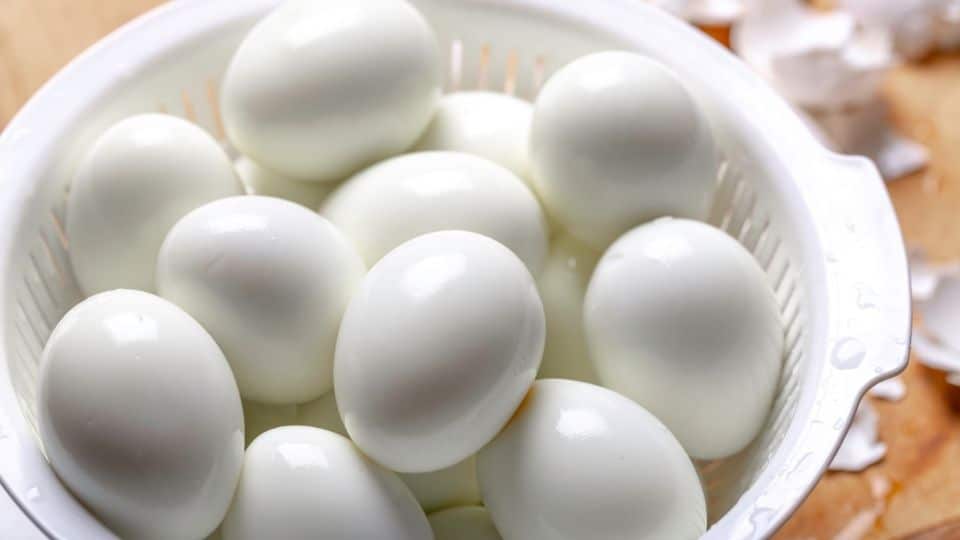
Step 6: Peel the Eggs
Once the eggs are fully cooled, it’s time to peel. Tap the egg firmly on a hard surface to crack the shell, then roll it gently under your palm to loosen it all the way around. Start peeling from the wider end of the egg; there’s usually an air pocket there that gives you a clean starting point.
Or better yet, peel under a thin stream of cold running water. The water gets under the membrane and helps the shell slide off cleanly without tearing the white.
Recipe Success Tips
These small details can significantly impact your results. Follow these tips to achieve perfect eggs every time.
- Use eggs that are at least a week old.
Fresh eggs work well for frying and scrambling. However, they are difficult to peel when boiled. Grocery store eggs are usually the right age. If your eggs are very fresh, store them in the fridge for a few extra days before boiling. - Never skip the ice bath.
The ice bath is crucial. It stops cooking, prevents the green ring, keeps the yolk yellow, and makes peeling much easier. Have it ready before you even start boiling the eggs. - Set a timer the moment you cover the pot.
Avoid estimating or guessing. The difference between a perfect yolk and an overcooked one is only two minutes. Use your phone or a kitchen timer; just make sure you have something to track the time. - Cook eggs in a single layer.
Stacked eggs cook unevenly. The ones on the bottom receive more heat than those on top. Use a pot wide enough so each egg lays flat on the bottom with some space around it. - Don’t boil the eggs aggressively.
This is why we remove the pot from the heat after boiling. Hard boiling tosses the eggs around, causes cracks, and toughens the whites. The gentle residual heat method is easier on the eggs and improves texture. - Peel under cold running water.
The water gets under the membrane between the shell and the white, allowing the shell to come off easily. - Cool completely before storing.
If you’re not eating the eggs right away, let them cool completely in the ice bath before moving them to the fridge. Storing warm eggs creates condensation inside the container, negatively impacting texture and reducing how long they stay fresh.
Variations and Ingredient Swaps
Once you’ve mastered the basic method, you can take hard boiled eggs in many different directions. Here are the most useful variations to know.
- Soft Boiled Eggs
Use the same method but remove the eggs after 6 to 7 minutes. The white should be fully set while the yolk remains jammy and slightly runny in the center. These are amazing over ramen, served on buttered toast, or added to grain bowls. The runny yolk acts like a sauce and enhances the flavors around it. - Medium Boiled Eggs
Take them out after 8 to 9 minutes. The yolk is mostly set but still has a slightly soft, creamy center. This is my favorite for salads and rice bowls. You get easy-to-slice eggs that are still rich and creamy inside. - Steamed Hard Boiled Eggs
Instead of boiling, place the eggs in a steamer basket over an inch of simmering water. Cover and steam for 12 to 14 minutes, then transfer them straight to the ice bath. Steaming is gentler than boiling, and many cooks say it produces the easiest-peeling eggs. It’s especially helpful if you only have very fresh eggs on hand. - Instant Pot Hard Boiled Eggs
Use the 5-5-5 method- 5 minutes on high pressure, 5 minutes natural release, then 5 minutes in the ice bath. The results are consistently great and the eggs peel almost effortlessly. This is a good option if you’re making a large batch for meal prep. - Soy Marinated Eggs
Peel your hard boiled eggs and soak them overnight in a simple marinade of soy sauce, mirin, a little sugar, and water. By morning, the whites soak up a deep savory flavor, and the outside turns a beautiful caramel brown. These are fantastic on ramen, rice, or eaten straight as a snack. Once you try them, you’ll want to make them again and again. - Deviled Eggs
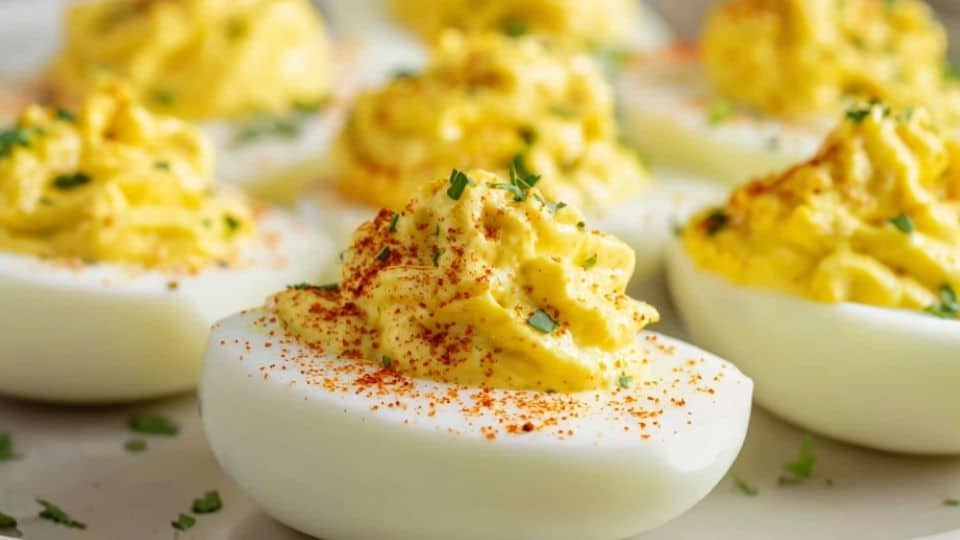
Slice your hard boiled eggs in half lengthwise, pop out the yolks, and mix them with mayonnaise, mustard, a splash of vinegar, salt, and pepper. Spoon or pipe the mixture back into the whites and finish with a dusting of paprika. Deviled eggs are one of the best party snacks. They disappear quickly. Use eggs cooked for 12 minutes to ensure the yolk is totally dry and mixes smoothly. - Egg Salad
Roughly chop your peeled eggs and mix with mayonnaise, a little mustard, diced celery, salt, and pepper. Serve it on toast, in a sandwich, over crackers, or scooped onto lettuce leaves. Egg salad takes about five minutes to prepare and keeps well in the fridge for three days. It’s one of the easiest things to make with a batch of hard boiled eggs. - Spice and Seasoning Swaps
You don’t need to eat hard boiled eggs plain. Try these simple finishing touches:
-
- Everything bagel seasoning – sprinkle directly onto a peeled egg
- Chili flakes and flaky salt – simple and addictive
- Smoked paprika and olive oil – feels fancy but takes ten seconds
- Hot sauce – classic for a reason
- Furikake – Japanese rice seasoning that works beautifully on eggs
- Soy sauce
What to Serve With Hard Boiled Eggs
Hard boiled eggs are one of the most versatile foods in your kitchen. They work for breakfast, lunch, dinner, and everything in between. Here are the best ways to serve them.
- As a Snack
Peel an egg, sprinkle it with flaky salt and black pepper, and eat it straight. Add a little hot sauce if you want some heat. It’s filling, high in protein, and takes about ten seconds to prepare. - At Breakfast
Hard boiled eggs fit well into a quick breakfast spread. Serve them alongside:-
- Buttered toast and sliced avocado
- Fresh fruit and yogurt for a balanced, protein-rich start
- Sautéed vegetables and leftover rice for a hearty savory breakfast.
-
- In Salads
This is where hard boiled eggs really shine. They add protein, richness, and substance to almost any salad. Try them in:-
- Niçoise salad, the classic French combination of eggs, tuna, green beans, olives, and potatoes
- Cobb salad, with eggs, bacon, avocado, chicken, and blue cheese over crisp lettuce
- Potato salad, with chopped eggs mixed into creamy or mustard-dressed potatoes
- Simple green salad, with sliced eggs on top of whatever greens you have on hand
-
- In Sandwiches and Wraps
Egg salad sandwiches are the obvious choice, but don’t stop there. Sliced hard boiled eggs work well in:-
- Whole grain wraps with hummus, cucumber, and spinach
- Open-faced sandwiches on sourdough with mustard and pickles
- Pita pockets stuffed with salad greens and sliced eggs
- BLT-style sandwiches with an egg added for extra protein
-
- In Grain Bowls and Rice Dishes
Hard boiled eggs are one of the easiest ways to add protein to a grain bowl. Halve them and place on top of:-
- Brown rice or quinoa bowls with roasted vegetables
- Fried rice as a protein addition
- Farro bowls with greens and a tahini dressing
- Noodle bowls with a soy-based sauce
-
- At Gatherings and Parties
This is deviled egg territory. A platter of well-made deviled eggs disappears faster than almost anything else at a party. Hard boiled eggs also work beautifully on:-
- Charcuterie and grazing boards alongside cheese, crackers, and cured meats
- Appetizer platters with dips and crudités
- Brunch spreads with other make-ahead dishes
-
Storage and Make-Ahead Instructions
Hard boiled eggs are among the best foods you can prepare in advance. Here’s what you need to know to store them properly and keep them tasting fresh all week.
- Storing Eggs in the Shell
If you’re not peeling your eggs right away, leave the shells on. Unpeeled hard boiled eggs last in the fridge for up to one week. Store them in a bowl. Keep them away from strong-smelling foods, as eggs easily absorb odors, even through the shell. - Storing Peeled Eggs
Peeled eggs require a bit more attention. Without the shell, they dry out quickly and can soak up odors from the fridge.
Two good options:
Option 1 – Water storage: Place peeled eggs in a bowl or container and cover completely with cold water. Change the water every day. This keeps the whites moist and fresh for up to 5 days.
Option 2 – Damp paper towel: Place peeled eggs in an airtight container lined with a damp paper towel. The moisture prevents them from drying out. Change the paper towel every couple of days. Good for up to 5 days. - Can You Freeze Hard Boiled Eggs?
The short answer is no. Not the whole egg, anyway. Freezing a hard boiled egg white changes the texture to rubbery, watery, and unpleasant. It’s not worth it. The exception is the yolk. Hard boiled yolks freeze reasonably well. If you have leftover yolks from deviled eggs or egg salad, place them in a single layer in a freezer-safe container and freeze for up to 3 months. Use them crumbled over salads or mixed into dressings straight from frozen. - Meal Prep Guidance
Hard boiled eggs are a smart addition to your weekly meal prep routine. Here’s how to make it work:-
- Make a batch of 6 to 12 eggs every Sunday. That gives you a ready source of protein for the entire week.
- Leave the shells on until you’re ready to eat. They provide a natural protective layer and keep the eggs fresher longer.
- Don’t pre-slice or chop until you need them. Cut surfaces dry out faster in the fridge.
- Pack them whole in lunchboxes with a small container of salt, pepper, and hot sauce on the side.
- Pair with other meal prep staples – cooked grains, roasted vegetables, and salad greens – for quick weekday lunches that come together in minutes.
-
- Reheating
Hard boiled eggs are best eaten cold or at room temperature straight from the fridge. They don’t reheat well in the microwave; the whites turn rubbery and the yolk can get an odd texture.
If you prefer a warm egg, let it sit at room temperature for 10 to 15 minutes before eating. That’s all it needs.

Frequently Asked Questions
- Why do my hard boiled eggs have a green ring around the yolk?
This is the most common issue with hard boiled eggs, and it comes down to two things: overcooking and skipping the ice bath. When eggs cook for too long or stay in hot water after cooking, a chemical reaction occurs between the sulfur in the egg white and the iron in the yolk. This reaction creates the gray-green ring you’ve seen before. It’s not harmful to eat, but it does mean the egg is overcooked, resulting in a dry and chalky texture. The fix is simple. Stick to the timing chart, remove the pot from heat as soon as it boils, and place the eggs in the ice bath immediately. Do those three things, and you’ll never see a green ring again. - Why are my hard boiled eggs so difficult to peel?
This usually comes down to one of two things: the eggs are too fresh or you skipped the ice bath. Very fresh eggs have a membrane that clings tightly to the shell, leaving no real gap for your fingers to work into. Older eggs peel cleanly because that membrane has pulled away slightly from the shell over time. The ice bath helps as well. The rapid cooling creates a small steam layer between the egg and the shell, making peeling much easier. Peel under cold running water and start from the wider end where the air pocket is located. - Can I put cold eggs straight from the fridge into the pot?
Yes, and this is actually the preferred method. Starting with cold eggs in cold water and bringing everything up to temperature together reduces the risk of cracking from thermal shock. It also allows for more control over the cooking process. The timing chart in this recipe is based on using cold eggs. If you happen to be using room temperature eggs, reduce your resting time by about one minute. - How do I know if a hard boiled egg has gone bad?
The easiest way is the smell test. Peel the egg and give it a sniff. A bad egg has a strong sulfur smell that’s hard to miss. You’ll know immediately. You can also check before cooking with the float test. Place the uncooked egg in a bowl of cold water. Fresh eggs sink and lie flat, while older eggs stand upright. Eggs that float have gone bad and should be thrown out. Properly stored hard boiled eggs in the fridge should be fine for up to a week in the shell and five days once peeled. - Can I make hard boiled eggs without a stove?
Yes, there are a couple of ways. The Instant Pot method works beautifully use the 5-5-5 method mentioned in the variations section. A dedicated egg cooker is another option if you make hard boiled eggs frequently. They are inexpensive, reliable, and take up minimal counter space. - What’s the difference between hard boiled and soft boiled eggs?
The difference lies in cooking time and the texture of the yolk. The method is the same: you use the same pot, start with cold water, and finish in an ice bath. Soft boiled eggs take about 6 to 7 minutes. The white is fully set, but the yolk is jammy and runny in the center. Hard boiled eggs go for 10 to 12 minutes, resulting in a fully set yolk. Medium boiled eggs sit in between at 8 to 9 minutes, with a mostly set yolk and a slightly soft, creamy center. That’s the one I use most often in salads and grain bowls.
Easy to Peel Hard Boiled Eggs - Perfect Every Time
Ingredients
Method
- Place your eggs in a single layer at the bottom of a pot. Don’t stack them.
- Pour cold water over the eggs until they are covered by at least one inch.
- Place the pot on the stove over medium-high heat.
- Let it come to a full, rolling boil
- The moment the water reaches a full boil, cover the pot with a lid and remove it from the heat completely.
- Now set your timer. This is where doneness is decided. 6 minutes for Soft boiled eggs with jammy center. 8 minutes for medium boiled eggs with mostly set, slightly soft yolk. 10 minutes for hard boiled eggs with fully set, creamy bright yolk. 12 minutes for classic hard boiled eggs with firm, fully set yolk.
- When the timer goes off, use a slotted spoon to transfer the eggs straight into your ice bath.
- Let the eggs sit in the ice water for at least 10 to 12 minutes
- Once the eggs are fully cooled, it’s time to peel.
- Tap the egg firmly on a hard surface to crack the shell, then roll it gently under your palm to loosen it all the way around
- Enjoy
More recipes you’ll love
- Classic deviled eggs. These deviled eggs disappear fast at a party. It’s every time. They look good, they travel easily, and they take less than 30 minutes to prepare.
- High Protein Cottage Cheese Egg Bites. Cottage cheese egg bites are one of the best meal prep breakfasts you can make. They are fast, filling, and easy to customize.
- Breakfast burritos. This burrito is one of the best things to eat before 10 am; scrambled eggs, sausage, hash browns, melted cheese, and a spoonful of salsa, all wrapped in a large flour tortilla.
- Breakfast casserole with hash browns. The perfect make-ahead recipe for the family, especially when dealing with a crowd.
- Banana pancakes. With this recipe, you’ll get a tall, golden stack with lots of banana flavor. Finish it off with maple syrup and extra banana slices for that classic brunch look.
One Comment
Comments are closed.