Soft and Chewy Pumpkin Chocolate Chip Cookies
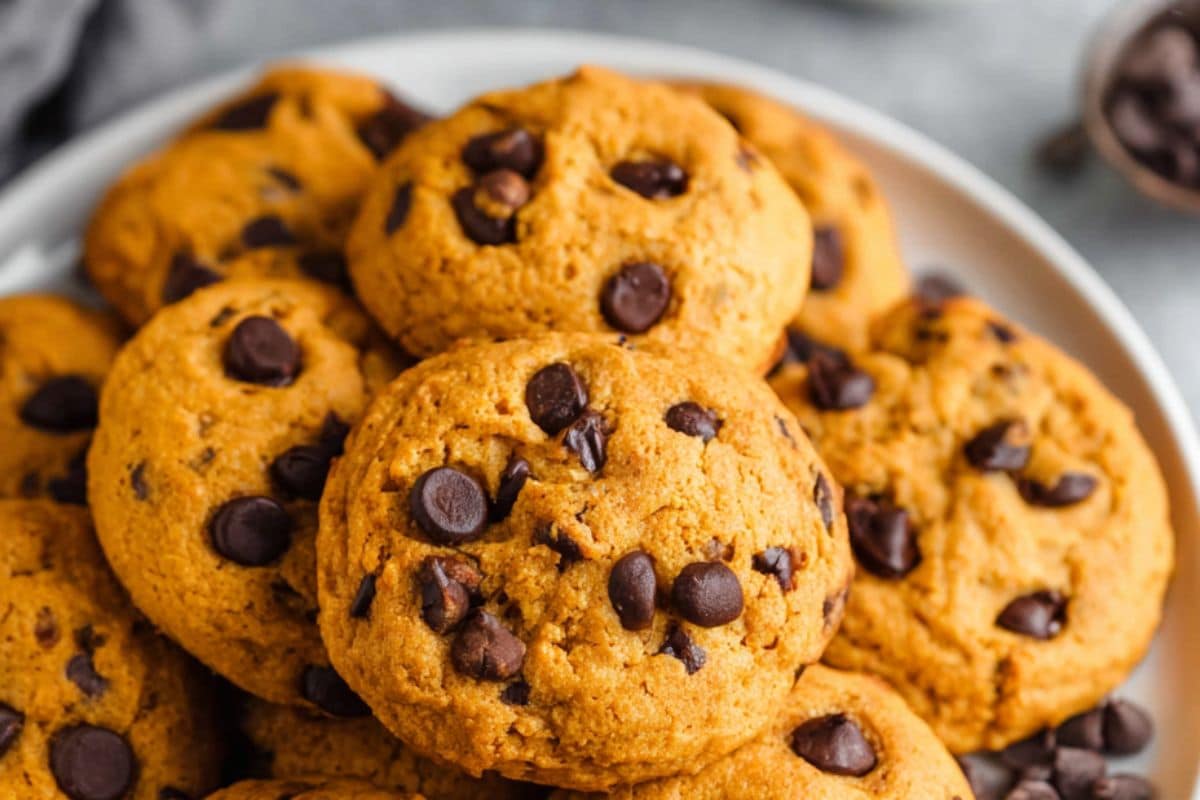
These pumpkin chocolate chip cookies are everything a fall bake should be. They are soft, warmly spiced, and packed with melty chocolate chips in every bite. You can make them in one bowl with ingredients you probably have on hand. They taste like autumn without needing anything fancy.
These are the cookies I make every fall without fail. They are the perfect dessert for a weekend bake with the kids, a Halloween cookie tray, a Thanksgiving dessert table, or just a regular Tuesday when you want something warm and homemade. They disappear quickly, no matter where I take them.
The best part? You don’t need a stand mixer to make these cookies; no chill time is needed, and the whole batch is ready in under 30 minutes. Let me show you how to make them.
Can’t get enough of these pumpkin dessert? Try this easy pumpkin muffin recipe.

Why You’ll Love This Recipe
Here’s why these pumpkin chocolate chip cookies deserve a spot in your fall baking routine:
- One bowl, minimal cleanup. You don’t need any special tools. A bowl, a whisk, and a spatula are all it takes.
- No chill time required. Scoop and bake right away. The entire batch is ready in under 30 minutes from start to finish.
- Simple, affordable ingredients. Everything you need is at your regular grocery store; most of it is probably already in your pantry.
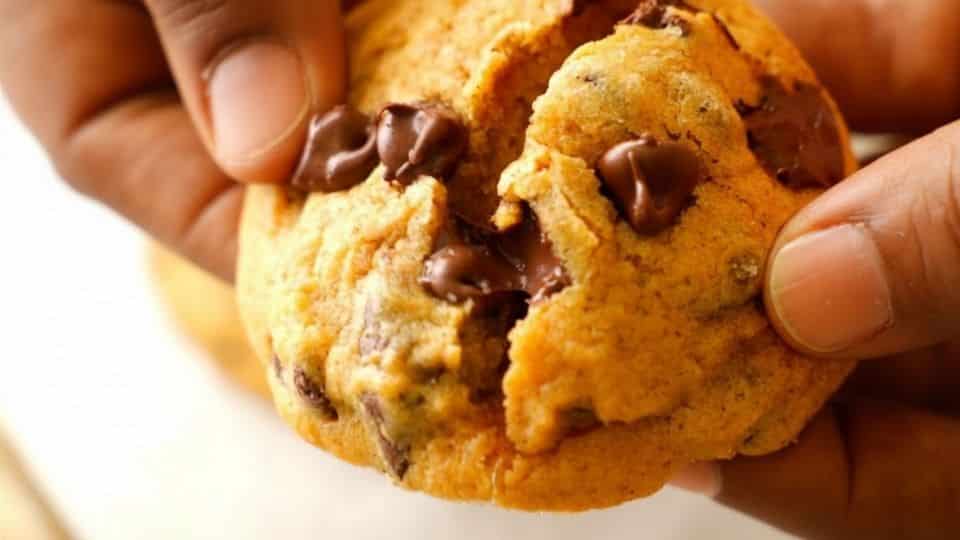
- Soft and chewy for days. These cookies won’t dry out overnight like many homemade ones. Store them properly, and they stay just as good on day four as on day one.
- Easy to customize. White chocolate chips, chopped pecans, or a brown butter twist. There are so many ways to make them your own.
- Perfectly spiced, not overwhelming. The pumpkin flavor is warm and noticeable without tasting like a scented candle. The chocolate balances everything nicely.
- Crowd-pleaser every single time. Kids love them. Adults love them. They disappear at bake sales, parties, and holiday cookie trays every time.
- Doubles easily. Making a big batch for a party or gift boxes? Just double the recipe. No adjustments needed.

Ingredient Notes
You only need a few simple ingredients here. Let me guide you through the important ones so you know exactly what to get and what to avoid.
- Canned Pumpkin Purée
This is your star ingredient. Choose plain pumpkin purée. Look for a can that contains just one ingredient: pumpkin. - Butter
I use melted butter in this recipe. It gives the cookies a denser, chewier texture compared to creamed softened butter. Let your melted butter cool for a few minutes before mixing it in. If it’s too hot, it can start cooking the egg yolk and affect your dough. - Brown Sugar and White Sugar
Using both produces the best result. Brown sugar adds moisture, chew, and a hint of caramel flavor. White sugar helps the edges crisp up and balances the sweetness. Don’t substitute one for the other; both are important. - Egg
The eggs alone provides richness and helps bind the dough - Vanilla Extract
It enhances the spice and chocolate while adding warmth to the flavor. Pure vanilla extract is best, but imitation is fine for this. - All-Purpose Flour
Standard all-purpose flour is all you need. Spoon the flour into your measuring cup and level it off with a knife. It takes an extra ten seconds and makes a noticeable difference. - Baking Soda
Baking soda helps the cookies spread and adds a slight lift without making them puffy. Ensure yours isn’t expired; old baking soda loses its effectiveness, and your cookies won’t spread properly. - Pumpkin Pie Spice and Cinnamon
I use both for a richer, more layered spice flavor. Store-bought pumpkin pie spice works well. If you don’t have it, you can make your own with cinnamon, nutmeg, ginger, and a pinch of cloves. - Chocolate Chips
Semi-sweet chocolate chips are my preference here. They balance the sweetness of the dough without being too bitter or too sweet. However, dark chocolate chips, milk chocolate chips, or even chocolate chunks also work beautifully, depending on your choice. - Salt. Don’t skip the salt. It balances the sweetness, enhances the spice, and brings out the chocolate flavor. A little goes a long way.

How to Make Pumpkin Chocolate Chip Cookies
This recipe is easy and only requires one bowl. The entire process takes about 15 minutes of hands-on time, and the oven will handle the rest. Here’s how to do it.
Step 1: Preheat Your Oven and Prep Your Pans
Preheat your oven to 350°F (175°C). Line two baking sheets with parchment paper or silicone mats.
Step 2: Blot the Pumpkin; Don’t Skip This
Spoon your pumpkin purée onto a few layers of paper towels. Spread it out slightly, then press another layer of towels on top. Let it sit for about five minutes, pressing gently to soak up the excess moisture.
This step is crucial. Canned pumpkin contains a surprising amount of water. Removing some moisture before adding it to the dough is what keeps cookies chewy instead of cakey. It takes five minutes, and it’s worth it.

Step 4: Mix the Dry Ingredients
In bowl, mix together the the flour, baking soda, pumpkin pie spice, cinnamon, and salt. Set aside

Step 3: Mix the Wet Ingredients
In a separate bowl, whisk together your melted, cooled butter and both sugars until combined and smooth. It should look like a thick, grainy paste at this point, which is normal.

Add the egg, vanilla extract, and blotted pumpkin puree. Whisk again until the mixture is smooth and slightly glossy, about 30 seconds.
Stir until everything is fully mixed.

Directly to the bowl with the wet ingredients add your dry ingredients that you had mixed and set aside earlier. Switch to a rubber spatula and stir until just combined. Stop as soon as you no longer see any dry flour streaks.
Don’t overmix at this point. Overworking the dough develops gluten and leads to tough cookies. A few quick folds are all you need.

Step 5: Fold in the Chocolate Chips
Add your chocolate chips and fold them in gently with the spatula. Make sure they’re evenly mixed throughout the dough.
If you want your cookies to look extra nice when they come out of the oven, set aside a small handful of chips. Press a few into the tops of each cookie ball right before baking. This simple trick makes a big visual difference.

Step 6: Scoop the Dough
Use a medium cookie scoop (about 1.5 tablespoons) to portion out the dough onto your prepared baking sheets.

Space them about two inches apart, as these cookies will spread a little.
If you don’t have a cookie scoop, you can use two spoons. Just try to keep your portions consistent so they all bake at the same rate.
The dough will be softer and stickier than regular cookie dough. That’s totally normal with pumpkin. Don’t add more flour; it’ll dry out your cookies.

Step 7: Bake
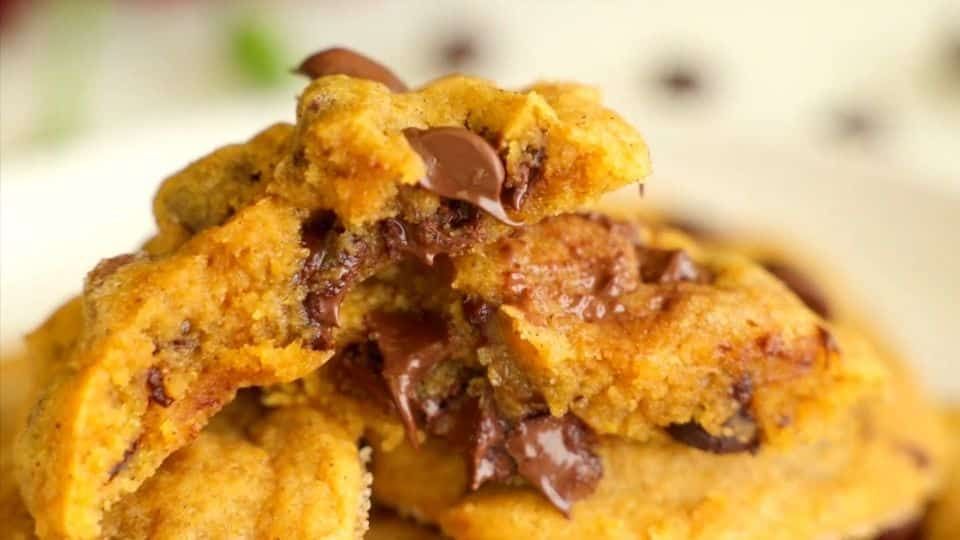
Bake for 11 to 13 minutes, until the edges are set and lightly golden. The centers will still look slightly underdone and soft when you take them out. That’s what you want.
They’ll continue to cook on the hot pan for a few more minutes after you take them out of the oven. If you wait until the centers look fully set, they’ll be overdone by the time they cool.
Baking one tray at a time is best if you can do it. If you have to bake two trays at once, rotate them halfway through for even baking.

Step 8: Cool on the Pan
Let the cookies rest on the baking sheet for 5 to 10 minutes before moving them to a wire rack. This resting period is important; it’s when they finish setting up and develop their final chewy texture. Try to resist eating them right off the pan. I know, it’s hard. But waiting five minutes makes them so much better.
Serve and enjoy!!

Recipe Success Tips
These details take your cookies from good to truly great. Keep these in mind when you first try the recipe.
- Blot your pumpkin every single time.
Excess moisture is the enemy of a chewy pumpkin cookie. Five minutes on paper towels makes a bigger difference than any other step in this recipe. - Let your melted butter cool before mixing.
If your butter is too hot when it touches the egg yolk, it can start to scramble it a bit. Let it sit for five minutes on the counter after melting. It should feel warm, not hot, when you touch the bowl. - Use only the egg yolk.
If you’ve made pumpkin cookies before and disliked the cakey texture, this is likely the reason. The egg white adds water. The yolk adds richness and fat. Fat equals chew, while water equals cake. Use just the yolk and you will notice the difference right away. - Spoon and level your flour.
Scooping the measuring cup directly into the flour bag can pack in up to 20% more flour than you actually need. That extra flour makes dry, crumbly cookies. Spoon your flour into the cup loosely, then use a knife to level it off. - Pull them out before they look done.
This is the tip most people ignore and later regret. The centers should look soft and just barely set when you take them out. They will firm up perfectly as they cool on the pan. Overbaked pumpkin cookies turn dry and crumbly fast. - Don’t have pumpkin pie spice? Make your own.
Mix 1 teaspoon of cinnamon, ¼ teaspoon of nutmeg, ¼ teaspoon of ginger, and a small pinch of cloves. This gives you a good all-purpose blend that works perfectly in this recipe. - Chill the dough if you want slightly thicker cookies.
This recipe works without any chilling at all. But if you have 30 minutes to spare, pop the dough in the fridge before scooping. Cold dough spreads more slowly in the oven, giving you slightly thicker, puffier edges with a more defined shape. It’s totally optional, but a nice upgrade if you’re not in a hurry.
Variations and Ingredient Swaps
One of the best things about this recipe is how easily you can change it. The base dough is simple and forgiving. This makes it a great starting point for different variations. Here are my favorites..
- Add Some Crunch. Fold in half a cup of roughly chopped pecans along with your chocolate chips. Pecans and pumpkin spice naturally pair well. The nuttiness adds depth, and the crunch gives the soft cookie some nice contrast.
- Brown Butter. This simple upgrade makes people ask for the recipe every time. Instead of just melting your butter, cook it in the pan over medium heat until it turns golden and smells nutty – about four to five minutes. Let it cool completely before using. Brown butter adds a deep, caramelized, almost toffee-like flavor to the dough that you simply can’t get any other way. It takes five extra minutes and is absolutely worth it.
- Gluten-Free. Swap the all-purpose flour for a 1:1 gluten-free baking flour blend. The texture will be slightly different a touch more tender and delicate but the cookies will still taste great. Make sure your baking soda and chocolate chips are certified gluten-free if you’re baking for someone with celiac disease.
- Cinnamon Sugar Roll. Before baking, roll each dough ball in a mixture of cinnamon and sugar. This creates a lightly crisp, sparkling exterior that looks impressive and adds a gentle crunch to each bite.
- Drizzle of Melted Chocolate. Once the cookies are fully cooled, drizzle melted dark or white chocolate over the tops with a spoon. It takes just two minutes and makes them look like they came from a fancy bakery. This is great for gifting or holiday trays.
- Sandwich Cookies. Bake slightly smaller cookies and sandwich two together with a thin layer of cream cheese frosting or vanilla buttercream. The tangy cream cheese against the spiced pumpkin cookie is an incredible combination. It takes a little extra effort and is definitely worth it for a special occasion.
When to Serve These
- Halloween Parties
Arrange the cookies on a tiered stand with other fall treats. They are easy to pick up, not too messy, and loved by people of all ages. Add some festive napkins, and you have a crowd-pleasing spread. - Thanksgiving Dessert Table
These pumpkin cookies stand up well next to pie. They are easier to serve than a slice of pumpkin pie, don’t need plates or forks, and give guests something a bit different. Make a double batch; they disappear faster than you think. - Holiday Cookie Boxes and Gift Tins
These pumpkin cookies travel well, stay soft for days, and look beautiful. Layer them between sheets of parchment paper in a tin, then tie it with a ribbon. You’re done. - School Bake Sales
These Pumpkin cookies are easy to portion and appeal to kids and parents alike. They are also allergy-friendly enough to change if needed. - Cozy Weekend Afternoons
Honestly, you don’t need an occasion. A rainy Saturday, a good book, and a plate of these cookies with a mug of something warm is reason enough.
Storage and Make-Ahead Instructions
One of the best things about these cookies is how well they keep. They don’t dry out overnight like many homemade cookies do. Make them ahead, store them properly, and they’ll taste just as good on day four as they did fresh out of the oven.
- Storing at Room Temperature
Place your fully cooled cookies in an airtight container and keep them at room temperature for up to five days. Layer them between sheets of parchment paper if you’re stacking them to prevent sticking. A cool kitchen counter or pantry shelf is ideal place to store these. - Storing in the Refrigerator. You can refrigerate these cookies for up to one week in an airtight container. A cookie straight from the fridge will feel denser and less soft than one stored at room temperature. The easy fix: pop one or two cookies in the microwave for 10 to 15 seconds before eating. They’ll soften right up and taste almost fresh-baked. Don’t overheat them; 15 seconds is usually plenty.
- These cookies freeze beautifully. Make sure your cookies are completely cool before freezing. Arrange them in a single layer on a baking sheet and freeze for one to two hours until solid. This step prevents them from sticking together. Transfer the frozen cookies to a zip-lock freezer bag or airtight container. Label with the date. Freeze for up to three months.
- Make-Ahead Options for Parties and Gifting. Bake two to three days ahead. These cookies actually taste slightly better after a day or two once the spices have had time to deepen and blend. Baking them a couple of days before a party or event means one less thing to worry about on the big day.

Frequently Asked Questions
- Can I use pumpkin pie filling instead of pumpkin purée?
No, and this is the most important label to check before you start. Pumpkin pie filling is already sweetened and full of spices. Using it instead of plain pumpkin purée will make your cookies too sweet, mess up the spice balance, and change the dough’s texture. - Why are my pumpkin cookies cakey instead of chewy? This usually comes down to two things: too much moisture in the dough and too much liquid from the egg. First, make sure you’re blotting your pumpkin purée on paper towels before adding it to the dough. This removes extra water that makes the cookies puff up instead of spread. Second, use only the egg yolk and toss the white. Egg whites contain water, while yolks contain fat. Fat creates chew, and water creates cake.
- Can I make these cookies without eggs? Yes. Make a flax egg by mixing one tablespoon of ground flaxseed with three tablespoons of water. Stir it together and let it sit for five minutes until it thickens and becomes gel-like. Use this instead of the egg yolk. The cookies will still bind and bake well. The texture will be slightly more tender and delicate than the original, but the flavor is just as good.
- Do I have to chill the dough before baking? No. This recipe works without any chilling time. You can scoop and bake right away and still get great results. That said, if you have 30 minutes to spare, chilling the dough does help. Cold dough spreads more slowly in the oven, leading to a slightly thicker cookie with a more defined edge and a chewier center. It also gives the spices more time to develop, which deepens the overall flavor.
- Why did my cookies spread too much or not enough? Several factors can cause this. If your cookies spread too much and came out flat and thin, your butter was likely too warm when you mixed it in, or your dough was too soft due to excess moisture in the pumpkin. Make sure your melted butter has cooled before mixing, and that you’ve blotted the pumpkin well. If your cookies didn’t spread enough and came out thick and doughy, you may have used too much flour. Remember to spoon your flour into the measuring cup instead of scooping directly from the bag. You can also try pressing the dough balls down slightly with your palm before baking to encourage a little more spread.
- How do I know when the cookies are done baking? The cookies won’t look done when they are actually done. Pull them out when the edges are set and lightly golden, but the centers still look soft, slightly underdone, and a little shiny. They will continue to cook on the hot baking sheet for another four to five minutes after you take them out of the oven. If you wait until the centers look fully set and matte inside the oven, the cookies will be overbaked and dry by the time they cool. Trust the process, pull them out early, and let the pan finish the job.
- How do I make my own pumpkin pie spice? If you don’t have pumpkin pie spice on hand, it’s easy to mix your own with spices you probably already have. Combine one teaspoon of cinnamon, a quarter teaspoon of nutmeg, a quarter teaspoon of ground ginger, and a small pinch of ground cloves. That’s it. This blend works perfectly in this recipe and keeps well in a small jar for future baking. You can also adjust the ratios to suit your taste more cinnamon for warmth, more ginger for a little kick.
- Can I use fresh pumpkin instead of canned? You can, but I’d stick with canned for this recipe. Fresh pumpkin purée has a much higher water content than canned, meaning you’ll need to blot more and the result may be less predictable. If you choose to use fresh, roast and purée your pumpkin first, then spread it on paper towels and blot it thoroughly more so than you would with canned. Make sure your fresh purée is smooth with no lumps before adding it to the dough. The flavor is similar and sometimes slightly sweeter, but the extra effort rarely results in a noticeably better cookie. Canned pumpkin is consistent, convenient, and perfect for baking.
Soft and Chewy Pumpkin Chocolate Chip Cookies
Ingredients
Method
- Preheat your oven to 350°F (175°C). Line two baking sheets with parchment paper or silicone mats.
- Spoon your pumpkin purée onto a few layers of paper towels. Spread it out slightly, then press another layer of towels on top. Let it sit for about five minutes
- Mix together the the flour, baking soda, pumpkin pie spice, cinnamon, and salt. Set aside
- In a separate bowl, whisk together your melted, cooled butter, eggs, and both sugars until combined and smooth.
- Add the egg and blotted pumpkin puree.
- Add your dry ingredients directly to the bowl with the wet ingredients
- Fold in the Chocolate Chips
- Use a medium cookie scoop (about 1.5 tablespoons) to portion out the dough onto your prepared baking sheets.
- Bake for 11 to 13 minutes, until the edges are set and lightly golden. The centers will still look slightly underdone and soft when you take them out.
- Let the cookies rest on the baking sheet for 5 to 10 minutes before moving them to a wire rack
- Serve and enjoy!!
Check out this other dessert recipes
- The Best Pumpkin Muffins. These muffins are warm and lightly spiced, neither too strong nor too bland. The texture is soft and tender, with a slightly dense crumb that stays good for days.
- The Best Homemade Pumpkin Pie Recipe – This is the pumpkin pie I’ve ever made. It has a silky, creamy filling that’s perfectly spiced, not too sweet, and not too heavy.
- The Best Pumpkin Bread. I love making this when I want something homemade without much effort. It works as a grab-and-go breakfast, an afternoon snack with coffee, or something to share with a friend.
- Banana bread recipe. This recipe works for any occasion. Slice it for breakfast with your morning coffee. Pack it in a lunchbox as an afternoon snack.